Month: March 2017

Eggs Benedict

It’s SO good to see the sun more often these days, and I’m loving the longer days again. It seems spring came early this year. So exiting!

I’m not the only one who’s enjoying early spring…the chickens have started laying better and the need to watch our egg consumption is now over. Yeah!!!025

Eggs taste so good and are good for you, especially the ones from free range birds. The chickens here on the homestead haven’t been outdoors much this winter but in the last few weeks they’re venturing out again and it’s fun to watch them scratch the ground and enjoying the sunshine…just as they should be.029

On slow mornings I love to make special breakfasts, one of these specialties is ‘eggs Benedict’. If you think this is difficult to make, let me tell you that if you get everything ready before you start, there’s nothing to it. Well, there’s nothing to preparing these eggs, but the taste is wonderful. It tastes tangy and light, but also creamy and smooth and it’s very filling.

Mar 2017 003

Let’s talk about the name. Funny name that, why Benedict anyways? It seems there are several stories that claim the origin of these special eggs, I don’t know which one’s true, but anyhow, the name comes from either the inventor, or the name of the cook, or the place where they were first served, someone honoring pope Benedict, etc. I’ll let you decide. More interesting is how to put this egg dish together.

Like I said, have everything ready before you start.

Kitchen tools:

  • whisk
  • double boiler
  • frying pan
  • toaster (or the wood stove if you’re off-grid like us)

Food list:

  • 2 English muffins, toasted (for my recipe check Off-Grid Baking) or 4 thick slices of bread
  • 4 eggs
  • 3 egg yolks
  • 1 T lemon juice (fresh pressed is best)
  • 1 T water
  • 1/2 c butter, cut into small pieces
  • bacon or a thick slice of ham, optional

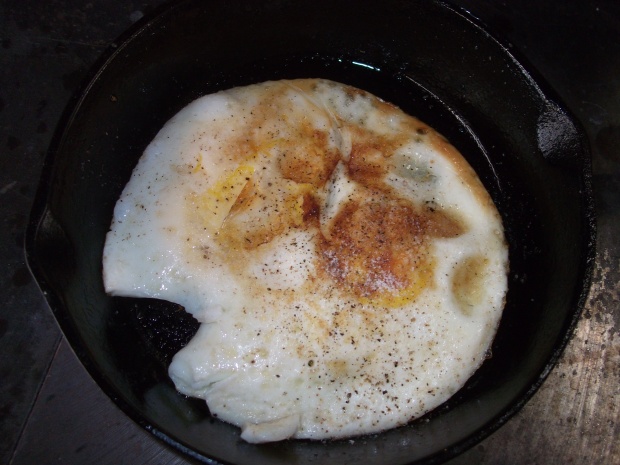
First fry your eggs, the true recipe calls for poaching the eggs, but we prefer them fried.

Mar 2017 001

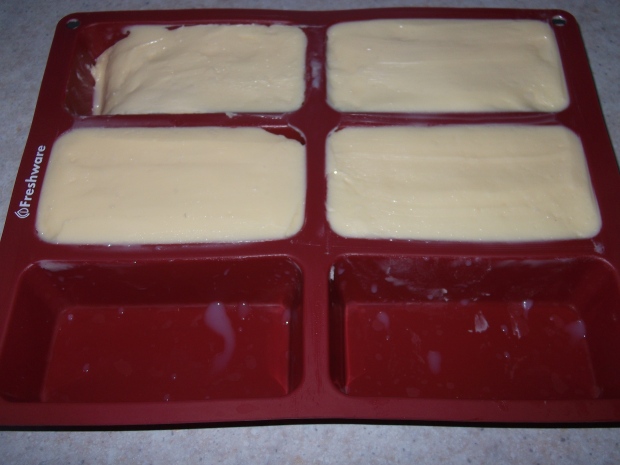
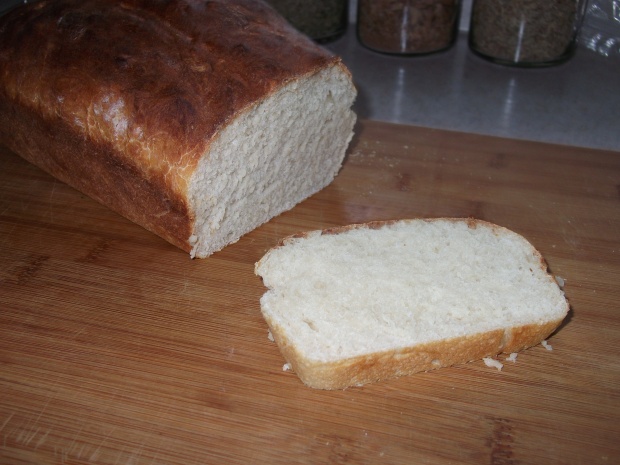
While the eggs are frying you could start your sauce and toast your English muffins. English muffins are what you’d usually put these eggs on, but I’m using my whey-out bread today, it needed to be used up.

Combine the 3 yolks in a double boiler and whisk in the lemon juice and water, then just as the sauce comes together (it thickens slightly) add your butter.Mar 2017 002

On each toasted muffin half, place one fried (or poached) egg each. (If you’re using bacon or ham place that on the muffins (or bread slices) before adding the eggs.) Drizzle the sauce evenly over the fried eggs. Sprinkle the whole works with some sea salt and pepper and it’s ready to eat.Mar 2017 004

What’s your favorite egg recipe now?


Garden Time Again

Yesterday I spent a nice afternoon in the garden! It’s quite amazing in our area to be able to be on the land this soon, but the snow has been gone for a week or so, day temperatures have been above freezing and the robins have definitely come home.

There was this to-do-list that was bothering me. Last summer and fall was such a busy one I didn’t have quite enough time to finish things in the garden. What a nice surprise to be able to get an early start.

The sun was shining, the birds were singing and a new gardening season has begun.

The biggest job was digging parsnips. I don’t plant that many because the rest of the family isn’t crazy about them. But what good is spring without at least a few fresh parsnips that have withstood winter’s barrage.march 2017 003

Next on the list was removing all dead broccoli, cauliflower and cabbage stumps. I left them in the ground last fall because we were having such nice and mild weather, I was hoping to keep harvesting, however the snow was soon too deep to bother.

I also cleaned up all the Swiss chard and kale stumps with the exception of two kale plants. I want to grow a crop of seeds this year, hopefully it’ll be as easy as growing Swiss chard seeds was the year before. I blogged about that here Swiss Chard

After an hour of clean up the garden looked pretty good…but empty! Well, mostly empty.

march 2017 009

The garlic came up really good, it’s always nice to see those green little shoots poking their way through their wood chip cover, way before any other green even thinks about growing.

march 2017 004

And another shot…march 2017 005

The spinach held its own. Looks like there are a few green tidbits to enjoy before the new crop is ready.march 2017 008

The next thing I want to do is plant peas, spinach and mache (corn salad).

Oh, and do something with these parsnips of course!march 2017 015


Fresh Butter on the Homestead

Before we became official homesteaders, (whatever it is that defines you as one, for me the defining moment was when we moved to this off-grid location) I tried my hand at making butter. I used a blender and thought there was nothing to it. The butter was fine, and because I’d used store-bought cream (the only cream I had access to back in the days) the butter tasted just like store-bought butter…which was just fine.

Butter making wasn’t a skill I needed to develop, it seemed simple enough and because we had no goats or cows at that time I let it go and got busy learning and practicing the skills I did need to develop (that and being very preoccupied with raising 3 kids).

Moving ahead quite some years I tried making butter with fresh Jersey cream from friends, the experience was quite different, the cream was thicker, tastier, much better quality, hence the butter turned out much better. Better butter. 🙂

Move ahead a few more years, I now have my own milk and cream to deal with from our sweet cow Ava. First of all, I’ve mentioned before that she’s not a heavy cream producer, we get about 2 cups of cream, maybe a little more per gallon of fresh milk. That’s nothing to shake your head at, but it takes a few days of saved up cream before it’s worth the trouble to make butter. The fat globules in her milk are very fine, much like goat’s milk, the cream takes longer to rise, the milk is naturally more homogenized than a Jersey cow’s milk. I like that, because it may be easier to digest.

So this is what I do now…I separate the cream from the milk two to three times in a row (whenever the fridge already contains quite some milk jars for drinking), and a day or two later I make butter. I wait an extra day because cream whips into butter much quicker and easier when it has ripened a bit. I also set out the cream on the counter several hours before I actually make the butter.

So I take my jars of slightly warmed up cream and dump them into my KitchenAid mixer. I put a towel over the mixer (this model doesn’t come with a splash guard) because this procedure may be messy, what with all that cream sloshing around, the towel prevents a mess on the counter and beyond.butter 005

Turn the mixer on 1, then 2 and after a few moments turn it to 3 and maybe 4. Sometimes on speed 4, if the bowl is more than half full, things become too messy, the cream wants to come flying out of the bowl, but that may be different for you and whatever mixer you’re using, just experiment with this.

After a few minutes you’ll see the cream come together and thicken.butter 006

Keep whipping, next you’ll get your old-fashioned whipped cream.

Keep whipping and you’ll see little flecks of butter in your bowl.butter 007.JPG

A few moments more and you’ll see clumps of butter swimming in a liquid.butter 008

Once the butter comes together you can strain off the liquid, but do save the liquid!!! This is your awesome buttermilk which you’ll want to use for pancakes, biscuits, or in any baking you are doing.

butter 010

old-fashioned buttermilk

Now wash the butter in cold water several times, for me that entails letting the cold water tap run and squishing the butter into flat patties over and over until no more milky liquid seeps out. You’re supposed to use a butter paddle on a board, and you certainly may, but who can be bothered when (clean) hands alone will do. I also let the cold water cool my palms once in a while, because as your hands warm up while manipulating the butter, it’ll soften the butter. You want cold butter, it’s easier to work with.

butter 009

Once you’re happy that your butter is clean, push it into a container and you’re done.

butter 011

my flexible butter mold

Because I’m anticipating being without any milk and cream this May and June when we need to dry Ava up before she calves, I’m making as much butter as I can and I’m freezing it, so that we don’t need to buy any butter during this time. I’m using a silicone mini loaf tray that fits up to 6 sticks of butter. Each stick holding approximately half a cup of butter. I place this tray in the freezer and once my sticks of butter are frozen I pop them out of the tray, wrap them in parchment paper and place the sticks in a freezer bag labeled with the date. Hopefully we won’t run out.

butter 012

frozen sticks of butter

See how easy making butter is? Nothing to it. But using this butter on your sandwiches and in your baking won’t be “nothing to it”, it’ll be delicious!

Homemade Pizza

Do you have a weekly food tradition in your family?

For quite some years our family has enjoyed homemade pizza on Friday night…like, every Friday night! I better not plan anything other than pizza on Friday night because it just wouldn’t be right (with the family that is), it wouldn’t work. If I made pizza any other night that would be just fine with my pizza-loving family too, but they’d be fooled into thinking it is Friday. lolpizza 007

We start from scratch with the crust. After playing around with some more health conscious  choices of flour, and flour preparation we’ve come back to the straight up, traditional, unbleached, all-purpose flour, but we go for the organic variety. None of us here suffers from gluten trouble (as far as we know) so the white flour doesn’t seem to be an issue in that regard. This pizza is not a health food anyways, but a weekly treat as we rarely go out.

For the crust we use:

  • 2 cups flour
  • 3/4 – 1 cup water
  • 1 T olive oil
  • 1 T sugar
  • 1 T Parmesan cheese
  • 1 t sea salt
  • 1 t yeast
  • 1 t pizza seasoning (see note)

Dump the whole lot in your mixer and mix for several minutes until the dough forms a ball, adding more water if the dough is too dry or more flour if the dough is too sticky.

Cover your mixer bowl with a clean towel and let rise anywhere from 30-60 minutes. Here we try to let the dough rise for an hour, but if we started the dough late because we were busy and still need to eat at a specific time we just cut the rising time short. It won’t matter.

Once you decide the dough has rested and risen enough you can punch down the dough and roll it onto your favorite pizza stone. I love using the Pampered Chef baking stones for this. Square, round, rectangular, whichever you have, just be sure you grease the stone a little with olive oil or butter first.

Now you can prepare you pizza sauce (or you could use canned pizza sauce from the store).

Pizza Sauce:

  • 2 cups salsa (or tomato sauce, or a can of tomato paste with 1/2 c of water added)
  • 1 t pizza seasoning

Once your crust is rolled onto your pizza stone you can go ahead by spreading the pizza sauce right up to the edge.pizza 002

Next to prepare are the toppings, for this your imagination comes in handy. Have you ever tried adding some different toppings on your pizza? I’ll want to hear about it.

Our family, well, I should say Farmer Hick and the teenagers here, eat very traditional foods and are not known to experiment with their food too much, so I keep things simple for them, sometimes as simple as a pepperoni and cheese pizza. If it was for me I’d make a pesto pizza, oh my…you really have to try that for yourself sometime. In place of tomato sauce spread your crust with basil pesto, or use both, you can’t go wrong with pizza in my opinion. Like I said, use your imagination and top that pizza with some of your favorite things.

pizza 003

half a plain pepperoni pizza the other half has chunks of last night’s meatloaf

For the cheese you can use whatever cheese you enjoy, our favorite is Mozzarella, but Colby Jack works too, homemade cheese curds are wonderful! As for the amount, that all depends on how cheesy you like your pizza. We use a fair bit, probably around 3 cups, just sprinkle it all over the toppings.

Bake at 400 degrees F for about 15 minutes, but you gotta watch it, things may burn quickly if your oven is too hot.

pizza 006

the wood stove really bakes a nice pizza

YUM!!!

Enjoy your Friday night….or whichever night this is for you.

Note: you can buy many good pizza seasonings, but you more than likely have most the necessary ingredients sitting right in your kitchen cupboard. This is how I make my pizza seasoning:

  • 6 T oregano
  • 3 T basil
  • 3 T garlic powder
  • 1 1/2 T thyme
  • 1 1/2 T fennel seeds, crushed (optional)pizza 001

Mix well, I actually like to run all the spices through an old coffee grinder but this is not necessary, if you don’t you’ll end up with a coarser mix. Store in a spice jar!


Whey Out Bread

On the weekend I got a compliment from one of my teenagers, from the one who’s palate prefers “junky” foods, (not that he always indulges, just saying). He liked the bread I had made and asked me to make it more often.004

That got me thinking…the recipe is good enough to share.

Since I’ve been trying my hand at some cheese making (I’ll post about that some day), there’s been lots of whey sitting around. Whey is a by -product of cheese making, it’s the liquid that’s left behind once your cheese takes form.

Whey is a great thing to feed the pigs…if you’re lucky enough to be feeding some. We don’t have pigs yet, they’ll probably come in July after Ava calves again.

Without pigs to toss the whey to there’s always the compost pile, but I wanted to try using some of it and came up with the idea to replace the water with whey in bread making. And you know what? It really works. Whey has lots of nutrients that water doesn’t, so I’m sure the bread is more nutritious for it.

My test was on white bread (a delicacy here, and surely enjoyed). I thought if it works then I’ll try it in our regular spelt bread recipe. Like I said before….it works, and it’s super easy, it only takes several ingredients.

March 2017 ice cream and bread 032

that’s the whey in the mixer bowl, enough for two loaves

By the way, if you don’t have access to whey but would still like to make this bread you can just replace the whey with water, or milk or a combination thereof, it’s still a good bread.

If you have whey and would like to try this out, you’ll need the following for one loaf. I mention the one loaf because in these pictures I’m making two loaves.

So, for one loaf:

  • 1 1/2 cups whey at room temperature (this is important)
  • 2 T sugar
  • 1 t yeast
  • pinch sea salt
  • 3 1/2 cups unbleached all-purpose flour

Combine the ingredients in your stand mixer and knead for several minutes, you may have to add a touch more flour if the dough is too sticky, or a dribble of water if the dough appears too dry and crumbly. This is one of the rare bread recipes where I didn’t have to play around with adding slightly more flour, but it may be different for you.

March 2017 ice cream and bread 034

Cover the bowl with a clean tea towel and set in a warmish place. I like to set my rising bread on top of the warming oven above the wood stove, but I always place a pot holder underneath so the bottom of the bowl doesn’t get hot. Warm is what we want so the yeast can do its thing. Let rise for about an hour.March 2017 ice cream and bread 036

Punch the dough down, sprinkle your counter with a small amount of flour and dump your dough on it, knead it a couple of times, shape the dough into a loaf and put it in your loaf pan.001

At this point you can slash your bread with a knife, about 1/4 inch deep, some say this creates a way for the steam to escape the bread as it bakes, maybe it’s true but the bread still bakes if you forget this step, today I remembered my vents (they could have been made slightly deeper). LOL Let rise again, just for 30-40 minutes this time.002

Bake in a hot oven, anywhere from 350 to 400 degrees F for 28-35 min. checking occasionally, until the loaves are browned and sound hollow when tapped.

Turn out on a cookie sheet, brush with some butter and let cool.003

Now call the family and do a taste test. Actually you may not have to call at all, the wonderful smell will have them begging in place (at least that’s what happened here on the homestead).


Homemade Ice cream

Many years ago, when visiting our wonderful friends, who operated an organic dairy, I learned to make ice cream. Once you’ve had the privilege  of eating homemade ice cream you’ll never want to get yours from the store again. The ice cream was so good that I’ve been making it for our family once a week ever since.March 2017 ice cream and bread 038

Ava, our Dutch Belted cow, is giving us lots of sweet milk, she’s not a heavy cream producer but I’ll take what I can get and make ice cream, well, actually it’s a toss-up between ice cream and butter.March 2017 ice cream and bread 020

Today I’ll show you how to make ice cream at home, but before I do, there are some things to consider:

  1. If you don’t have access to farm fresh cream, then just get the next best thing from the store, but know that the quality of the ice cream will be compromised.
  2. The ice cream tastes best if using full cream, but you may substitute with rich milk, just be sure to at least have 1 cup of rich cream.
  3. The more milk you use, the longer it may take for the ice cream to freeze.
  4. For best results you need an ice cream maker (any type) but if you don’t have one you can still make ice cream by using a mixer and your freezer, again, the end results are not as good.
  5. The best thing about home made ice cream is that you can use whatever sweetener you prefer but you may have to play around with the amounts. I never make my ice cream with sugar, it seems a waste to pollute fresh, rich cream with it.
  6. This recipe uses farm fresh egg yolks, if you have a problem with that then may leave them out.

OK, let’s go. You’ll need:

  • 1 liter heavy cream (you may use less and supplement with milk)
  • 2-3 cups milk (the cream and milk combined should make no more than 1 liter)
  • 2-4 egg yolks (I have used up to 8 when the chickens are on a roll)
  • 1/2 c maple syrup (or honey)
  • 1 T vanilla extractMarch 2017 ice cream and bread 028

In a medium size bowl combine the yolks, syrup and vanilla, mix well. Slowly add your cream/milk mixture. I usually use the full 4 cups of cream, but today I do not have the full amount of cream, so I’m supplementing with full milk.

Pour the contents in your ice cream making bucket.March 2017 ice cream and bread 029

Put the bucket in your ice cream maker and let it do its thing.March 2017 ice cream and bread 030

Twenty to thirty minutes later you’ll have lovely (soft) ice cream.March 2017 ice cream and bread 037

At this point I usually put the ice cream in a glass container with a lid and leave it in the freezer until dessert time, it will get firmer.

Enjoy!

PS For those without an ice cream maker, mix all the ingredients, pour in a freezer proof container and freeze for half an hour. Take our the container, mix it all up again, set it back in the freezer. Repeat several times until the ice cream does not separate anymore. After that you can just leave it in the freezer for several hours and enjoy your dessert when frozen.

Adventures of a Milk Maid

Well, it’s been a few days since we started milking Ava.

feb-2017-009

The beautiful Ava and her dainty heifer…we’ve named her Ebony

Whew! What a responsibility. Don’t get me wrong, I want to do this and did not walk into this adventure blinded. I knew this would be a huge thing to take on.

The first day of milking we milked by hand because our milker hadn’t arrived yet. Ava was fairly calm and enjoyed her treat of grains but she was impatient with me. The hand milking just took too long and I wasn’t very good at it, (she prefers the machine which milks her out in a few minutes). We weren’t able to get all the milk out that first day, so we milked her twice that day. Farmer Hick helped out in the evening.

It’s important to get all the milk out for two reasons, milk left behind may encourage mastitis and also signals the udder to produce less milk. So, I was pretty worried that day.

The second day our new portable milk machine arrived. Farmer Hick helped me to set it up and off to the barn we lightheartedly went.

I had not expected the job of getting the milkers onto Ava’s teats to be SO frustratingly difficult!

For any of you who use portable bucket milkers….you’ll understand this. LOL A large hand is needed to pinch off all the hoses while one by one you stick each milker onto the cow. My hands are not tiny, but it still wasn’t happening. No success.

That first day with the milker I failed miserably and Farmer Hick got quite impatient with me. However, once he got the job accomplished he agreed that it’s not an easy job. LOL

After the milking, straining and bottling I pulled out my favorite ‘cow’ book by Mary Jane Butters because I remembered reading a little blur on milk machine manipulation. Sure enough, this smart lady has dealt with the same frustration I felt that day and has since learned a few tricks. The next day I followed her advice and what do you know? It worked! Milking was over in a few minutes. Whew!!!

If you ever read this Mary Jane, know that your book is a gem! I hope you know that already. Thanks for taking the time to write it.

To all you future milk maids…don’t get a milk cow unless you’re a 100% committed and DO buy Mary Jane’s book. The title is ‘Milk Cow Kitchen’. Besides great advice on all sorts of cow subjects, it has many cheese making recipes with step by step instructions and pictures, plus many recipes using milk and cheese with beautiful photography.

This is where I’ll end today’s post. I have to go milking again…..

Stay tuned!